 HOME
HOME
 INSTALLATION
 1. Library setup
 2. Getting started
 DOCUMENTATION
 1. General Architecture
 1.1. Core Module
 1.2. Game Module
 1.3. Network Module
 2. Entry point
 2.1. Life cycle
 2.2. Engine initialization
 2.3. Sequence control
 3. Base tools
 3.1. Primary objects
 3.2. Factory & Handler
 3.3. World container
 4. Network games
 4.1. Chat
 5. Level Editor
 5.1. Standard base
 5.2. Extension
 6. Tutorial
 FORUM
FORUM
 DOWNLOADS
 Last release (8.1.0)
 GitHUB repository
 Projects using the LionEngine


Tutoriel
Introduction
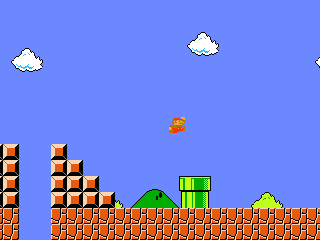
This tutorial will show you how to create a prototype of Mario by using entirely the LionEngine, both its core library and the provided editor. Here are the main steps:
- Setup project and its resources
- Import the project in the editor and prepare game resources
- Gameplay implementation
- Finishing with music and sound
Project setup
To make a game, you may need some graphics resources. For this time, they are gracefully provided here: Resources. You will find the entities graphics, a level rip, music and sounds. If you don't know how to start with the LionEngine, follow the installation page:
Once your project is ready, you should have something like this: code
Import the project in the editor and prepare game resources
Start now the editor (download the release depending of your system), and import your project with the following configuration (files/import):
- Classes: bin
- Library: bin
- Resources: resources
Click Finish and the project tree should now display your project as root.
You can now start to import the tiles from the level rip provided in the resources, by clicking on the top-right world view tool bar.
- Click (+) and locate the level rip (resources/map/level.png)
- Choose resources/map/ as export location
- Set the tile width and height to 16
- Set the horizontal tiles to 6 and vertical tiles to 5 (it will fill perfectly the tilesheet)
You will then find a generated file called 0.png in resources/map/. This is our tile sheets !
Right click on map folder node in the project view, over Add tilesheets (use the default name). Double click on sheets.xml and edit it with our tile previous tile size (16*16) and check 0.png.
Add now the groups (also with default name), edit it, and add the block group (it will represents our collisions later).
Import a map from a level rip (top-right world view tool bar), select the resources/map/level.png rip, and as you used the default name for tilesheet and groups, it should auto fill the two other fields. Accept. Cancel the collisions step. You should now can see the map inside the editor, and navigate with keyboard arrows keys.
Select tile pointer, click on the ground tile (there is two lines of them), they will be highlighted. Double click on Group property (bottom), and select block group. Do the same for the all green pipe tiles. Select also the plain block over the ground (go to the left of the map). Now all block tiles should be highlighted, but not the others. You will see something like this:

Click now Add collisions and Add formulas (with default name). Edit the formulas, and add 4 formulas called top, bottom, right, left, with the following configuration (click Confirm after each changes):
- top: Output = Y, minX = 15, maxX = 15, minY = 0, maxY = 0, Linear function with all at 0, constraint top = none
- bottom: Output = Y, minX = 15, maxX = 15, minY = 15, maxY = 15, Linear function with all at 0, constraint bottom = none
- right: Output = X, minX = 15, maxX = 15, minY = 0, maxY = 15, Linear function with all at 0, constraint right = none
- left: Output = X, minX = 0, maxX = 0, minY = 0, maxY = 15, Linear function with all at 0, constraint left = none
Edit the collisions, and add a new item called block. Add the 4 formulas for this item with their name.
You can now minimize the editor, and go back to you code, in order to import you ready to use map as a level file:
private static void importAndSave()
{
    final MapTile map = new MapTileGame();
    map.create(Medias.create("map", "level.png"), Medias.create("map", "sheets.xml"), Medias.create("map", "groups.xml"));
    try (FileWriting file = Stream.createFileWriting(Medias.create("map", "level.lvl")))
    {
        map.save(file);
    }
    catch (final IOException exception)
    {
        Verbose.exception(Scene.class, "importAndSave", exception, "Error on saving map !");
    }
}
Add a WorldGame to handle easily the map, like this: code
Gameplay implementation
Add an ObjectGame class called Mario, with a basic implementation, such as here: code
Gameplay starts here:
@Override
protected void onPrepared()
{
    StateAnimationBased.Util.loadStates(MarioState.values(), factory, this);
    handler.start(MarioState.IDLE);
    handler.addInput(keyboard);
}
Gameplay states can be easily defined with this class: code
Their implementations must define a routine, and possible transitions betweens states.
Go back to the editor, and right click on the entity folder node in the project view, and click Add object called Mario.
Select Mario.xml, and double click on the Class property, and choose your class (Mario). Choose also SetupSurface for the Setup property. Right click in the properties view to Define surface. Select the Mario.png sprite image. Right click again to define the Frames (7 horizontals and 6 verticals).
Activate now the Animations and edit them by double clicking on the node. Add the Mario animations (idle, walk, turn, jump, die), and save.
You should now see something like this:
Global code: code
Finishing with music and sound
Refactor your Mario class by adding an Entity class before, so that Mario will only contains the specific player code, and you will be able to add a Goomba class. Add also its object descriptor, animations... Create its specific Die state.
Check the Collidable trait to handle collision between objects.
Add an SFX class handler to play sounds with ease: code.
Update the State implementation to play sounds at the right time (on jump...).
Start the music once level is loaded.
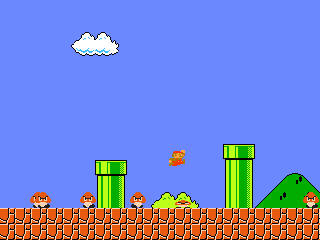
You should now see something like this:
Global code: code